The butterbean aka dried lima beans is a Southern classic that often gets overlooked. Butterbeans can be cooked any way you like and many people have many twists on their favorite recipes. I'm going to share with you my favorite way to cook butterbeans. We are having them for dinner tonight with some hot water cornbread.
Put 1 lb. of butterbeans in a pressure cooker. (I am using the small ones but any size is ok.)
Add in 8 cups water, 1 1/2 tsp. salt & 1/4 tsp. black pepper.
About an hour before serving turn pressure on for 20 minutes.
Check for doneness. If not done yet turn back on for about 5 minutes. (They do not take as long as some other beans.)
When done add in 1/4 cup of butter.
Stir & serve!
You can also do this on the stove top or crockpot. Just adjust cooking times.
Stovetop- approximately 1 hour, if soaked before
Crockpot- approximately 5 hours
Butterbeans make a great main dish or side dish. Left-overs freeze well and they also taste even better the next day for lunch.
Enjoy!
Showing posts with label back to basics. Show all posts
Showing posts with label back to basics. Show all posts
Wednesday, August 20, 2014
Wednesday, August 13, 2014
Whole wheat blueberry pancakes

1 egg
1 c. milk
1/8 c. coconut oil
1 c. freshly ground whole wheat flour (or could use white)
1 1/2 tsp. baking powder
1/2 tsp. salt
blueberries
Whisk wet ingredients together & then whisk in the dry until no lumps.
Cook on griddle and dot with blueberries.
Flip and when done enjoy!
This recipe can easily be doubled if you need more pancakes for your family.
Tuesday, July 22, 2014
What's up doc?
 |
| My daughter & my son's girlfriend hard at work peeling away! |
Sure they do. Have you ever seen a bunny wearing glasses?
My son used to love that joke.
We finally got some rain last week so we went out, in the rain, and pulled up all of the carrots that were left in the garden.
Carrots are mostly tops so with the tops we had 2 laundry baskets full of carrots.
Sunday after church we sat out on the porch and cut off all of the tops & ends.
Then brought them in for a through washing & peeled them.
After we set all of the small ones in a pile and cut the others into coins.
 |
| The stove was busy. Some of the carrots here waiting to be blanched and some tomato sauce cooking on the left. |
Blanched them for about 3 minutes and then allowed them to drain & cool.
Then we packed them up in freezer bags & in the freezer they went.
We ended up with 10 bags full.
So now we've got plenty of squash & carrots put up!
I really appreciated the help I got from the family or I'd have been at this all day. With everyone helping it took us about 2 hours from start to finish.
As for all the green tops & peels they didn't go to waste. The chickens loved them.
Thanks y'all!
(You can easily can carrots, I just personally don't like the texture of a canned carrot)
Sunday, July 6, 2014
Apple Butter
Yesterday we picked a bushel of apples from the only apple tree on the homestead. They are a green, granny smith variety. They are much too tart to enjoy just eating plain but they make really good apple butter & applesauce.
This year it was a family affair. I really appreciated the help & it went much faster & we ended up with a delicious result!
I have 2 crockpots an oval traditional type and then I have an electric pressure canner that can also function as a crockpot.
We used the apple corer, peeler, slicer and then handed that off to the next person who used a paring knife to cut off the remainder of the skin & any bad spots. Then the next one filled up both crockpots with the slices.


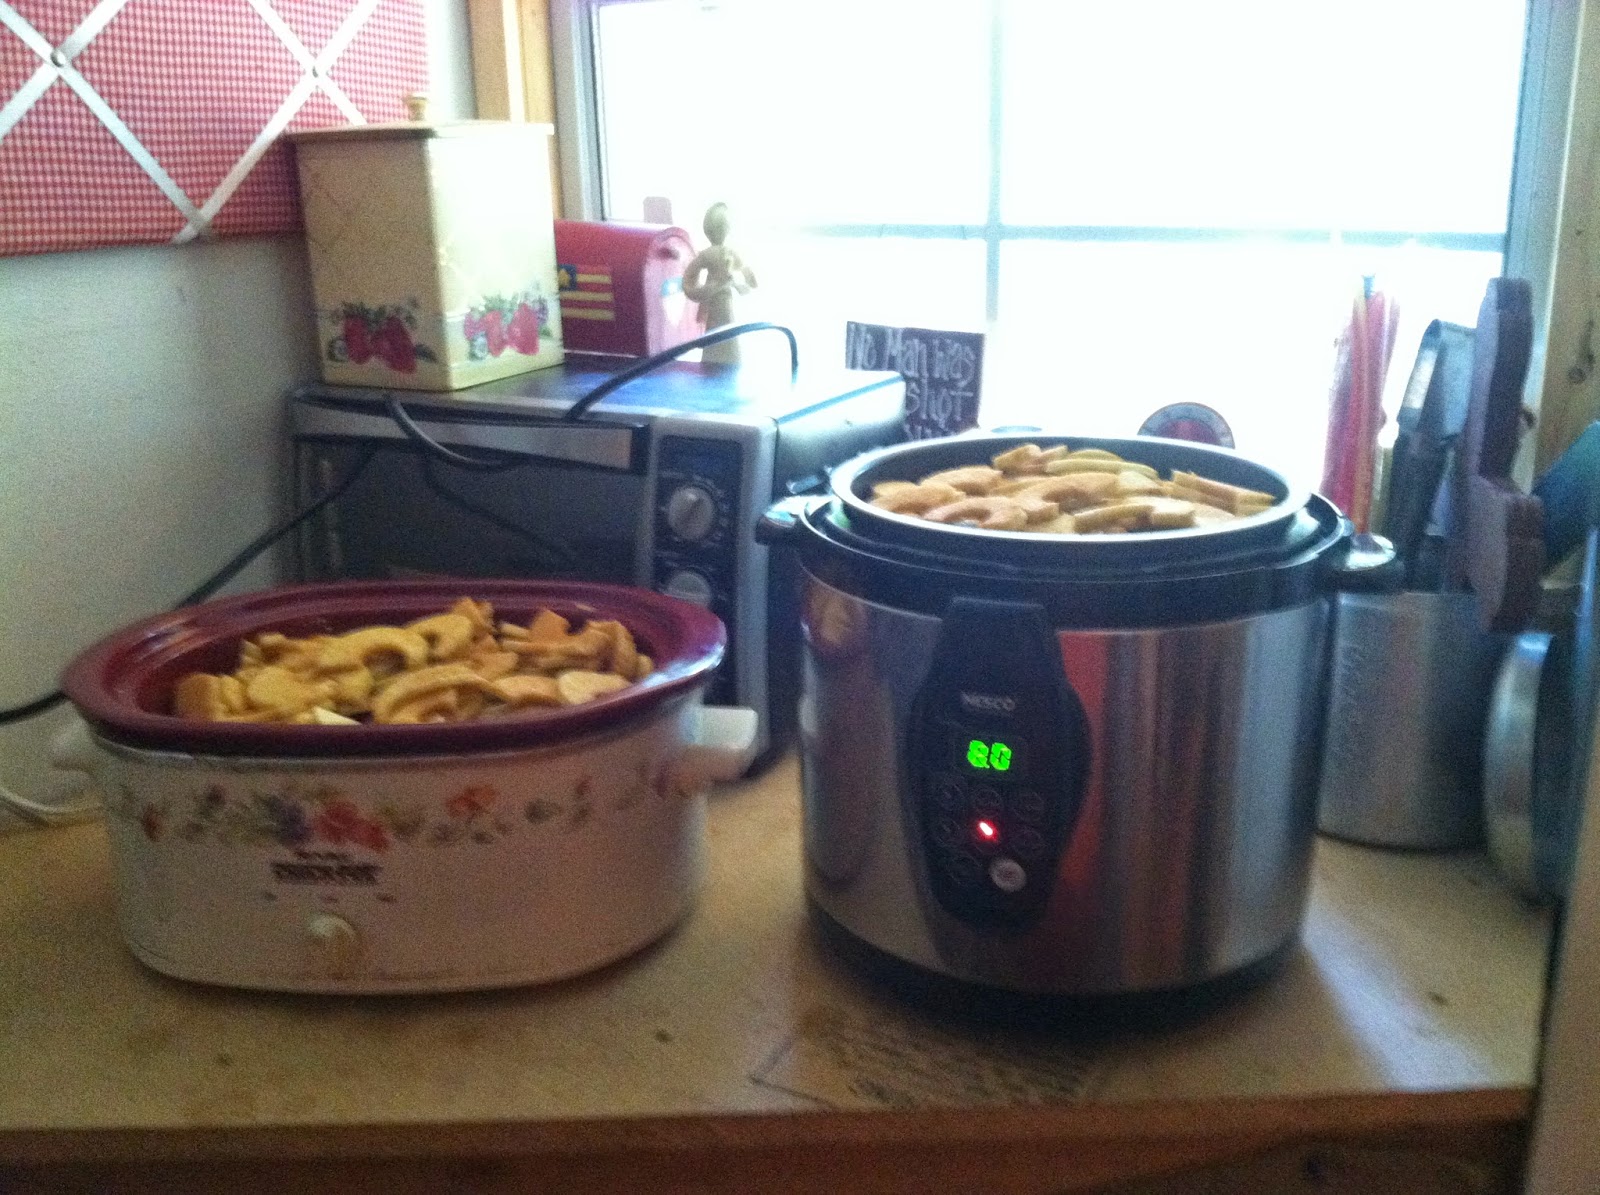
To each pot we added 2 cups of sugar, 4 tsp. of cinnamon, 1/2 tsp. nutmeg, 1/2 tsp. cloves, and 1 1/2 cups water.
Now time to wait!

Put on the lids and cook for 8-12 hours. Depending on your cooker. Stir every couple of hours. I let it cook over night.
The apples will turn to 'mush' and when they are all tender and dark it's done.

If you like it a little chunky then leave it alone. If not use a stick blender & smooth it out. (I did)
You can store it in the refrigerator or freezer. If you make a lot, like we did, you can also can it.
To can your apple butter place it in pint or half-pint jars.

Canning time is 10 minutes in boiling water bath.

(Please look up canning procedures if you have never canned before & you do so at your own risk.)
This year it was a family affair. I really appreciated the help & it went much faster & we ended up with a delicious result!
I have 2 crockpots an oval traditional type and then I have an electric pressure canner that can also function as a crockpot.
We used the apple corer, peeler, slicer and then handed that off to the next person who used a paring knife to cut off the remainder of the skin & any bad spots. Then the next one filled up both crockpots with the slices.
To each pot we added 2 cups of sugar, 4 tsp. of cinnamon, 1/2 tsp. nutmeg, 1/2 tsp. cloves, and 1 1/2 cups water.
Now time to wait!
Put on the lids and cook for 8-12 hours. Depending on your cooker. Stir every couple of hours. I let it cook over night.
The apples will turn to 'mush' and when they are all tender and dark it's done.
If you like it a little chunky then leave it alone. If not use a stick blender & smooth it out. (I did)
You can store it in the refrigerator or freezer. If you make a lot, like we did, you can also can it.
To can your apple butter place it in pint or half-pint jars.
Canning time is 10 minutes in boiling water bath.
(Please look up canning procedures if you have never canned before & you do so at your own risk.)
Friday, July 4, 2014
Homemade Meat Sauce
We are fortunate enough have a big garden every year & I can all of my own tomato products. --Except ketchup. Well, I actually have made homemade ketchup but my daughter really prefers the store bought kind so I do buy ketchup.

So now on to the sauce...
Homemade Meat Sauce
3/4 - 1 lb. of ground beef
1 quart or 4 c. tomato puree
1/4 c. tomato paste
1/4 c. brown sugar
1 T. chopped garlic
1 T. basil
1 T. parsley
1/4 tsp. salt
1/4 tsp. pepper
Brown beef & drain off the fat. ( I add some salt & pepper to the beef while browning.)
Then add in all of the rest of the ingredients.
Allow to simmer for about 15 minutes.- About as long as it takes to boil the water & cook the noodles.
That's it. Serve over pasta, vegetables, etc.
*I do not add sugar to my tomato puree or paste when I make them myself. If you are buying them in the cans taste the sauce before adding in the sugar. You may not need it.
Wednesday, July 2, 2014
Super Easy Oven BBQ Chicken & Roasted Veggies
Last night we had a really healthy & delicious dinner of oven BBQ chicken & roasted veggies.
The best thing about this recipe is the prep is very easy & you just throw it all into the oven for about an hour.
Oven BBQ Chicken:
Any chicken pieces you like. Boneless or bone-in. (I used chicken thighs & pulled off the skin)
BBQ sauce- any flavor
Cooking spray or non-stick foil
Spray your baking sheet with the non-stick spray or line it with foil.
Place the chicken pieces so they are not touching.
Then paint on some BBQ sauce.
Bake at 350 until done.
Baste with the BBQ sauce 2-3 more times while cooking.
Roasted Veggies:
Any veggies you like cut up into bite sized pieces. (I used sweet potato, squash, carrots, onion, & mushrooms)
Drizzle with olive or coconut oil.
Sprinkle with salt, pepper, garlic powder, & any other herbs you like.
Toss well & bake along with the chicken.
350 for about 30 minutes - 1 hour depending on what veggies you use.
Stir half way through cooking.
I served this meal with some green beans because I had them left-over from another meal.
The best thing about this recipe is the prep is very easy & you just throw it all into the oven for about an hour.
 |
| Oven BBQ Chicken, Roasted Veggies, & Green Beans |
Oven BBQ Chicken:
Any chicken pieces you like. Boneless or bone-in. (I used chicken thighs & pulled off the skin)
BBQ sauce- any flavor
Cooking spray or non-stick foil
Spray your baking sheet with the non-stick spray or line it with foil.
Place the chicken pieces so they are not touching.
Then paint on some BBQ sauce.
Bake at 350 until done.
Baste with the BBQ sauce 2-3 more times while cooking.
Roasted Veggies:
Any veggies you like cut up into bite sized pieces. (I used sweet potato, squash, carrots, onion, & mushrooms)
Drizzle with olive or coconut oil.
Sprinkle with salt, pepper, garlic powder, & any other herbs you like.
Toss well & bake along with the chicken.
350 for about 30 minutes - 1 hour depending on what veggies you use.
Stir half way through cooking.
I served this meal with some green beans because I had them left-over from another meal.
Monday, June 9, 2014
More About Potatoes
I had a couple of questions about the potatoes we harvested Saturday.
Kind- New Red Potatoes
When to plant- It depends on your area but here in Louisiana Jan-Feb. You can also re-plant right now but we usually just till up that ground and plant something else.
When to harvest? When the plants seem to wilt/ begin turning brown & dying off.
How many did we get? We did weigh them and ended up with about 180 lbs.!!!
Storage- We dust them off somewhat and then put into bags. Burlap & crawfish sacks work great and that's what we use. We then put them in our large pantry. You want them kept cool-room temp and dark. The burlap helps with that. If you have a root cellar or basement & live in a less humid climate you would store them there. (I saw where you can take a plastic tote and drill some holes to allow air to flow through & then store like that. Looks like a good idea but I've not tried that.)
I check the potatoes about once a week. Look for any fruit flies & sour smells. If you have that you will need to search out the culprit potatoes & remove them immediately.
DO NOT store in the bags any potatoes that are wet or cut. They will rot & cause the others around them to rot too. You can set those potatoes aside and use them first.
You can also dehydrate & can potatoes.
What do we do with all of them? Eat them. LOL There are so many things to do with potatoes: fried, boiled, mashed, potato pancakes, potato salad, scalloped, etc.
We did grow a lot of potatoes but if kept properly they will last our family a long time.
I saw yesterday at the grocery store a 2lb. bag of small red potatoes was selling for $6.99! So this year we are saving big!!!
Saturday, June 7, 2014
Potatoes
We harvested our potatoes today.

We will store them & they should last us through winter. :)
Gardening is a lot of work but it's worth it!
We will store them & they should last us through winter. :)
Gardening is a lot of work but it's worth it!
Tuesday, February 11, 2014
Back to Basics: How to boil an egg

It's that simple!

Thursday, February 6, 2014
Back to Basics: How to make scottish oatmeal

pinch of salt
1 tsp. coconut oil (optional but it gives a great flavor & prevents sticking)
1 c. Scottish oats
In a pot with a lid place 3 cups water and a pinch of sea salt.
Bring to a boil.
Add in 1 cup Scottish oats and 1 tsp. coconut oil. (This helps to prevent sticking to the bottom of the pot.)
Bring to a boil and then cover.
Turn the heat to low & allow to simmer for 10 minutes, covered.
Stir 2 or 3 times during cooking.
Serve as you would any oatmeal.
My favorite is 1 tsp. coconut oil, 1 T. brown sugar, and a little almond milk.
This yields about 4, 1 c. servings.
Subscribe to:
Posts (Atom)